A lot of plastic parts need to be made of plastic molds. Knowing how to build these, no matter your skill level, is very useful. This simple guide will walk you through the whole making process, from idea to finish. You will learn to pick the right supplies and form them using machines. Also, ensure the quality of these. To make these for vehicles, devices, or everyday items, follow these steps. You can make great ones while knowing the steps with the aid of this guide.
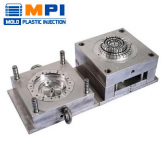
How to make plastic molds
What You Need?
- Design Software: Use a computer program. It is vital for it
- Material: The best materials for the best one are silicone or epoxy resin.
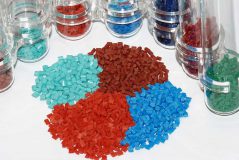
- Pellets made of plastic: These will be your finished item.
- Master Model: The thing you want to clone is the master model.
- Release Agent: the stuff that removes it from the master model.
- Mixing Tools: Cups and sticks are signs of mixing tools.
- Mould Box: A storage unit for the master model and material.
- Vacuum Chamber: Air pockets can be reduced using an extra vacuum chamber.
What are the easy and exact steps to make plastic molds?
Design it
Design is the first stage. You’ll need to use software to make a 3D model. The master model you’d like to make should be entirely copied into this model. It may be vital if your item has detailed lowers or forms. Then, split it into a few pieces to make the final product easy. This is a critical phase since it sets a basis for the whole making system.
Prepare the Master Model
The master model has to be ready next. First, make sure the master model is clear and free of dirt. This ensures that there are no flaws in the finished ones. Use a release agent once the master model has been cleared. The master model won’t stick to the material due to this layer. Also, when it has dried, it will be simpler to remove.
Build the Box
The next step is to build the box. You have to wrap the master model in a box. And use wood, plastic, or any other right stuff to do it. To give room for the stuff, the box has to be a bit bigger than the master model. The box ensures that the material grows around the master model and helps control it.
Mix and Pour the Material
A key stage is combining and placing the material. The maker’s tips must be followed while mixing silicone or epoxy resin. Pour the stuff into the box gently when it’s ready. Air pockets are less likely to occur when you pour gently. And it might lower the finished quality. Make sure the material covers the master model all the way.
Cure it
You must give the fluid time to cure after filling it. Allow it to cure as per the rules; this might take a few hours or a full day, based on the material used. If you have one, use it to get rid of any trapped air bubbles in this stuff. This step ensures it is sturdy and error-free.
Take out the Master Model
After the material has dried, take it out of the box carefully. Avoid damages; this calls for quality and care. The master model needs to be gently removed. This stage must be finished correctly to ensure that it keeps its form and options.
Cast the Plastic Part
You can put it in the plastic part now that it is set up. Set up the plastic items first. Melt plastic pellets or get the plastic ready, based on the kind you pick to use. To avoid it from sticking, use a releasing agent inside. Fill the cavity with the melted plastic. You may need to employ injection technique handles for oversized or complex items. Permit the plastic to cool and solid in line with the material’s needs.
Finalize the Part
After the plastic has dried totally, take it out with care. To avoid damaging the part, follow this step with care. Remove any extra material and smooth rough edges to finish the plastic item. This stage verifies that the final item is fit for usage and of the best quality.
What are the tips for making plastic molds successfully?
- Accuracy in Design: Make sure your CAD design is exact to avoid errors in the final item. Significant parts may be made with a well-designed one.
- Make Use of Better Materials: Better supplies offer better items. Ongoing investing in quality supplies might result in time and effort savings.
- Exact Venting: Correct Venting Make sure it is fully aired to avoid air bubbles and flaws. Enough air allows similar and complete filling.
- Safety Measures: Work in an area with good airflow and use safety gear. Choosing safety is vital when dealing with chemicals and materials related to it.
You may create true, long-lasting ones using these steps. Both novice and expert makers will find this book beneficial. Have fun making your plastic components!
Who gives top services on plastic molds with expert skills?
Ex MOULD Co., Ltd. is a fantastic option if you’re searching for the most excellent location to get these. Their meticulousness and superior craftsmanship are well-known attributes. They use a talented staff and best machinery to ensure that every product is ideal. They can help you whether you want these for electronics, vehicles, or usual products. They provide reliable and effective service. You may check out their EX MOULD Co., Ltd. website to learn more about them and their services.
At the bottom line,
To sum up, creating these is a careful process. You start by making a complete design. The next step is to choose a sturdy material, such as aluminum or steel. The stuff is carved by machines into it. It gets polished to an ideal shape. After that, it gets put in a unique device. Plastic is melted by this tool and then injected into the frame. Then, it opens, and the final plastic part is removed after cooling and setting. Lastly, you check the part for flaws. This careful process ensures that every part is of the highest quality and usable.