2024.2.21
Hey there! Get ready to dive into a fun and colorful adventure. Here, we give those cool plastic decorations and blow molds a brand-new look. Those awesome figures that light up our gardens and homes on holidays? Sometimes, they fade and need a little makeover to sparkle again. It is where we get in! We’ll see how to paint blow molds to turn them ugly into pretty. We’ll take you step-by-step through the steps. Given your goals, we can play with strange new colors or leave them as good as new. So, take your paint brushes, and let’s start this amazing ride. And turn your blow molds into the happy season’s finest stars.
Painting blow molds —those decorations we see on holidays—is like giving them a makeover! Here’s how you can do it, step by step, in a way that’s easy and safe:
What you need:
Step-by-Step Painting Guide:
Cleaning Time
Mix mild soap with water and use a cloth or sponge to clean your blow mold. Any leftover dirt can make painting tricky.
Smooth It Out
Using fine sandpaper, polish the top. The aim is to boost the paint’s grip on the surface, not to remove material. Wipe off the sanding dust afterwards.
Tape for precision
Use tape to cover any parts you want to keep paint-free. It is excellent for preserving details or creating sharp lines between colors.
Painting Techniques
Protect Your Art
After the paint dries completely, cover it with a clear acrylic coat. This step protects outside artwork from sunlight, rain, and damage.
Remove the tape
Take off any tape you used.
Curing
Give your blow mold plenty of time to dry and cure. As the paint and sealer suggest, have fun before putting it outside or playing with it.
Tips for Success:
Following these steps, you can turn an old one into a brand-new treasure! Have fun with your painting project, making it shiny and new or giving it a new look!
For many reasons, painting the blow molds we see around the holidays is a great idea. Here’s why painting is an ideal task to do:
Bring Back Its First Look: These molds may fade or age. Painting them will give them their fresh, shiny, new-as-when looks.
Your unique design: Your blow molds can be colored in any hue you like! Do you want a blue pumpkin or a pink Santa? You may set up for the holidays based on the theme of the event or on the colors you love.
It lasts longer: Your blow molds can last longer outdoors without damage, thanks to a fresh coat of paint. And it protects them from the elements. It is like using the sun to safeguard the skin!
Save Cash: You can repaint your existing displays before buying a new set every year. It’s an original way to look lovely for the holidays without breaking the bank.
They Look Better: Your blow molds look even more unique and cool if the small features can be seen with fresh paint.
Fun Activity: Painting it may be an ideal family activity or a task you do alone. Viewing how they change by applying a little color is stunning.
Reviving Old Designs: Painting older ones that are no longer created can bring them back to life. It is like giving a used item new life.
Coloring your blow molds is a great way to boost the life of your signs, have fun, and save money. And you are also making them look great. So take out some paint and begin to live what comes to mind!
There’s a great online spot to learn about blow molds . There are cool plastic decorations, and you know how to build or paint them! You can visit EX MOULD Co., Ltd.’s website if you’re curious to learn more about it , no matter your skill level. They show you how these decorations are made, give tips on how to paint them yourself, and lots more fun stuff. It’s a great place to get ideas for your projects or to learn something new. So, are you interested in making your decorations look awesome? Watch EX MOULD Co., Ltd.’s website for helpful information and tips!
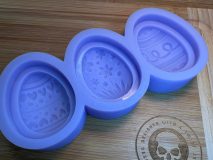
These are cool plastic decorations often seen during the holidays. Painting them can make old ones look new or let you create your very own designs!
Sure! Use paint outside, and think about adding a clear coat to protect your painting from rain and sun.
Usually, two or three thin layers do the trick. Let each layer dry before adding another one.
Spray paint is fantastic for a smooth start, and brushes are great for the fancy stuff. Always paint in a place with lots of air.
Yes! Add sparkles while the paint’s wet, or use glow-in-the-dark paint for fun effects. A clear coat on top keeps everything in place.
Conclusion
In conclusion, painting these molds is a fun and creative activity everyone can enjoy. It’s like giving a new life to your favorite decorations! Remember a few simple steps to ensure your painted ones look fabulous and last long. Clean them well, use a unique base coat to help the paint stick, and choose the right paint for colorful designs. Painting and letting each layer dry will make your decorations look even better. You can also try different painting tricks to make your blow molds look cool and unique. By following these tips, you can turn any blow mold into a beautiful art piece you’ll be proud to show off!