Injection mold manufacturing process refers to the process of processing and assembling injection mold through certain processing technology and process management. Many customers who cooperate with injection mold manufacturers may not follow up every stage of the project. So, they will not understand how the injection mold factory processes their products. EX MOULD is a professional plastic injection mold making and injection molding company in China, we share this article to explain the whole process of plastic injection molding.
The Whole Process Of Plastic Injection Molding
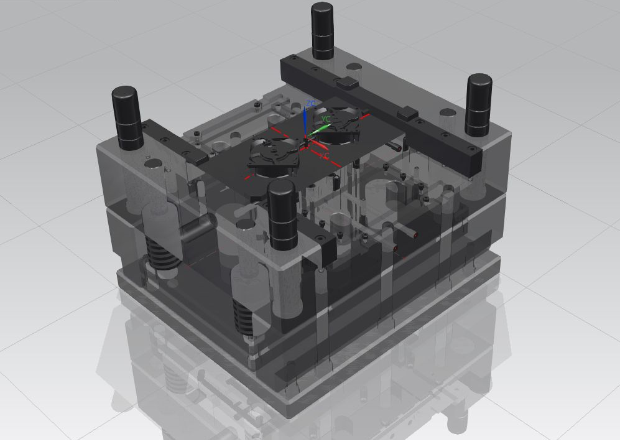
Here’s the whole process from product drawing to mold making, and then to injection molding production. The steps include mold design, order steels and inspection, make cooling and screw holes, CNC machining on cavity and core side, order mold base and frame making, electrodes making, EDM process, wire cut, polish, fitting, assembly and mold trial.
1. Mold design. First of all, we need to design the mold according to the 3d data, material character and production requirement. One mold include two halves, one is fixed half, usually we call it cavity side. One is moveable half which called core side. The core side move back and forth to control mold opening and closing. Before mold making, we use Moldflow software to verify mold design and simulate injection molding process. Try to forcast and avoid some defects during injection production.
2. Cooling & screw holes. Order steel blocks from main inserts of cavity and core. Use the milling machine to mark the positions of screw holes and cooling lines. Then drill through holes for cooling line. Block the end of through holes with small aluminium bars. Then form several cooling loops.
3. Core CNC machining. Use CNC machine to cut steel on main insert of core, it usually take couples of hours or even one whole day.
4. Cavity CNC machining. CNC machining on main insert of cavity. Which may also takes several hours.
5. Electrodes making. Some complex shape on steel can not be machined by CNC milling, but we can use EDM process, the electrodes are important for EDM process. Use CNC machined to cut the cooper blocks which also take several hours to get the shapes as the CNC programer desire. The quantity of electrodes is determined by the complexity of the mold. Sometimes we need hundreds of them for a single mold. Then cut them piece by piece after CNC machining is done, then clean the burs.
6. EDM process. EDM process erodes material from work piece by the meaning of pulse discharge between electrodes and steel inserts in spark oil. The electrodes and steel inserts are infinitely close to each other but not in contact. We can make a gate shape electrodes to EDM a shape hole.
7. Wire cut. Use Wire EDM machines to cut through holes for ejectors. The ejector can go through the holes smoothly, neither too tight nor too loose. It will cause flash issue during injection molding if too loose.
8. Polishing process. Use sandpaper, whetstone and ultrasonic tools to remove marks from EDM and CNC machining process. To uniformed the finish of forming area.
9. Moldbase machining. You can order standard mold base which will save lots of time to make mold plates and spare parts. Then use the CNC machine to cut a frame on A plate and B plate, make sure they can fit main inserts of cavity and core side.
10. Mold fitting. Apply a thin layer of red ink to cavity side, then put the core plate and cavity plate together. Beating the cavity plate with an aluminium bar, make sure the parting surface contact as mold closed, then separate them. If red color appears in the seal area(parting line) of the core, it indicates that the core and cavity fit well.
11. Assembly. Once all spare parts of the mold are ready, assemble them to a complete set of mold, then the whole manufacturing process is done!