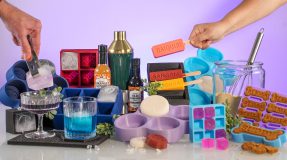
Making your own silicone molds opens you to a world of possibilities. This is wonderful for hobbyists as well as artists and company entrepreneurs.
This is a short lesson that will show you how to make your own silicone molds. At home, you can finish this. Through the whole process, we will guide you. Getting what you need will be our first step. Following that, we’ll walk you through taking your finished item out of the mold.
Why Making Your Own Silicone Mold Matters?
It’s really important to craft using your own silicone mold. This is the reason why:
Make It Your Way: When you construct your own silicone mold, you can develop designs that correspond with your vision. You are not limited to simple forms. You can create intricate patterns or even unique symbols. There are no limits!
Save Money: Purchasing the supplies needed to create silicone molds may initially seem pricey. But over time, you’ll find that it’s less expensive. The mold can be reused repeatedly. You won’t need to buy fresh molds in this technique.
Be Creative: You can express your creativity to the fullest by creating your own mold. You’re not limited to the merchandise in the store. You can create one-of-a-kind creations that showcase your flair.
Produce Copies Easily: You can utilize your mold once it is already created. This works well for creating jewelry, soap, and resin artwork. Since you’re using the same mold, every piece you make will have the same appearance.
Perfect Fit: Occasionally, the molds you purchase from a store don’t fit your project well. You can customize a silicone mold to precisely suit your needs by creating one yourself. Every time, you’ll get a flawless fit.
Discover Something New: There is more to creating a silicone mold than the finished product. A chance to gain knowledge. You’ll learn concepts like geometry and chemistry. You’ll also pick up problem-solving skills in an enjoyable, practical manner.
Protect the Environment: One method to be environmentally conscious is to make your own mold. Reusing resources allows you to reduce waste. This contributes to the preservation of our world.
Develop Skills: Making silicone molds will teach you a vital new skill. It’s a useful, practical method that can help you feel more confident. Furthermore, learning anything new feels fantastic!
Keep Up with Trends: New concepts and trends emerge frequently. You can stay up to date with these developments if you know how to manufacture your own silicone mold. You are always free to experiment with other designs.
Make Connections: You join the crafting community by sharing your mold-making experiences with others. You may network with like-minded individuals, share ideas, and encourage others to pursue their own creative endeavors.
How to Make Your Own Silicone Mold Easily at Home?
We’ll take you through each step of the procedure with thorough instructions in this step-by-step guide, enabling you to begin shaping like a pro.
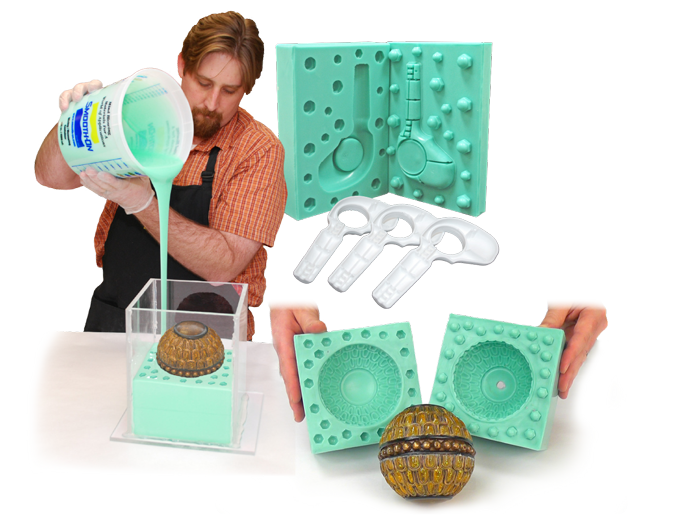
Step 1: Gather Your Supplies
First things first, gather all the necessary supplies. You’ll need:
- Silicone rubber compound
- Mixing container
- Stirring stick or spatula
- Object to create a mold of
- Mold release agent (optional)
- Scale for accurate measurements
Step 2: Prepare Your Workspace
To work, find a spotless, well-ventilated place. Put down a covering to keep spills and messes at bay. Having a neat workspace is crucial to making sure that the molding process goes well.
Step 3: Prepare Your Object
Select the item that you wish to cast a mold of. Make sure it’s dust- and debris-free and clean. Use a mold release chemical if your product contains undercuts or fine features to help with the demolding procedure afterwards.
Step 4: Measure and Mix the Silicone Rubber Compound
As directed by the manufacturer, measure out the necessary quantity of silicone rubber compound with care. For accurate measures, using a scale is strongly advised. Transfer the measured silicone rubber compound into a mixing vessel.
Step 5: Mix Thoroughly
Using a stirring stick or spatula, thoroughly stir the silicone rubber compound. To make sure all the ingredients are combined properly, make sure to scrape along the sides and bottom of the container. To attain a consistent consistency and prevent any lumps or air bubbles in your mold.
Step 6: Pour Over Your Object
Once the silicone rubber compound is well combined and ready to use, carefully apply it to the item you have ready. Pour the silicone evenly over the whole surface of the object starting from one corner. To guarantee thorough coverage, take your time.
Step 7: Let It Cure
After pouring the silicone over the item, let it cure by the manufacturer’s recommendations. Typically, this entails leaving it alone for a specific period until it has completely cured and is ready for demolding.
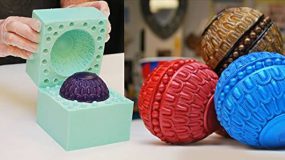
Step 8: Demold Your Silicone Mold
Once the curing time has elapsed, carefully extract the silicone mold from your item. Take your time, being cautious not to harm the original object or the mold. Use a mold-release chemical if necessary to speed up the demolding procedure.
Step 9: Trim and Clean Up
Cut out any extra silicone around the mold’s edges with scissors or a sharp knife. This stage guarantees a clean finish and helps to tidy up the edges. Your silicone mold is now prepared for usage after trimming!
Step 10: Check Your Mold
Do a test run with your mold before utilizing it for any projects. Fill the mold with casting material, then observe the outcome. This will assist you in determining any problems and, if necessary, making corrections.
Step 11: Store Your Mold Properly
Keep your silicone mold somewhere dry and cool to improve its lifespan. Steer clear of bending or deforming the mold since this may eventually impact its shape and functionality.
Best wishes! You’ve made your own silicone mold with success. Now go crazy with your imagination and start casting your own unique designs.